Have you ever wanted to turn a photo of your dog into a Christmas ornament? We've outlined all the steps with photos to show you how to do it!
Before you begin you will need...
-
Photos of your dog(s)
-
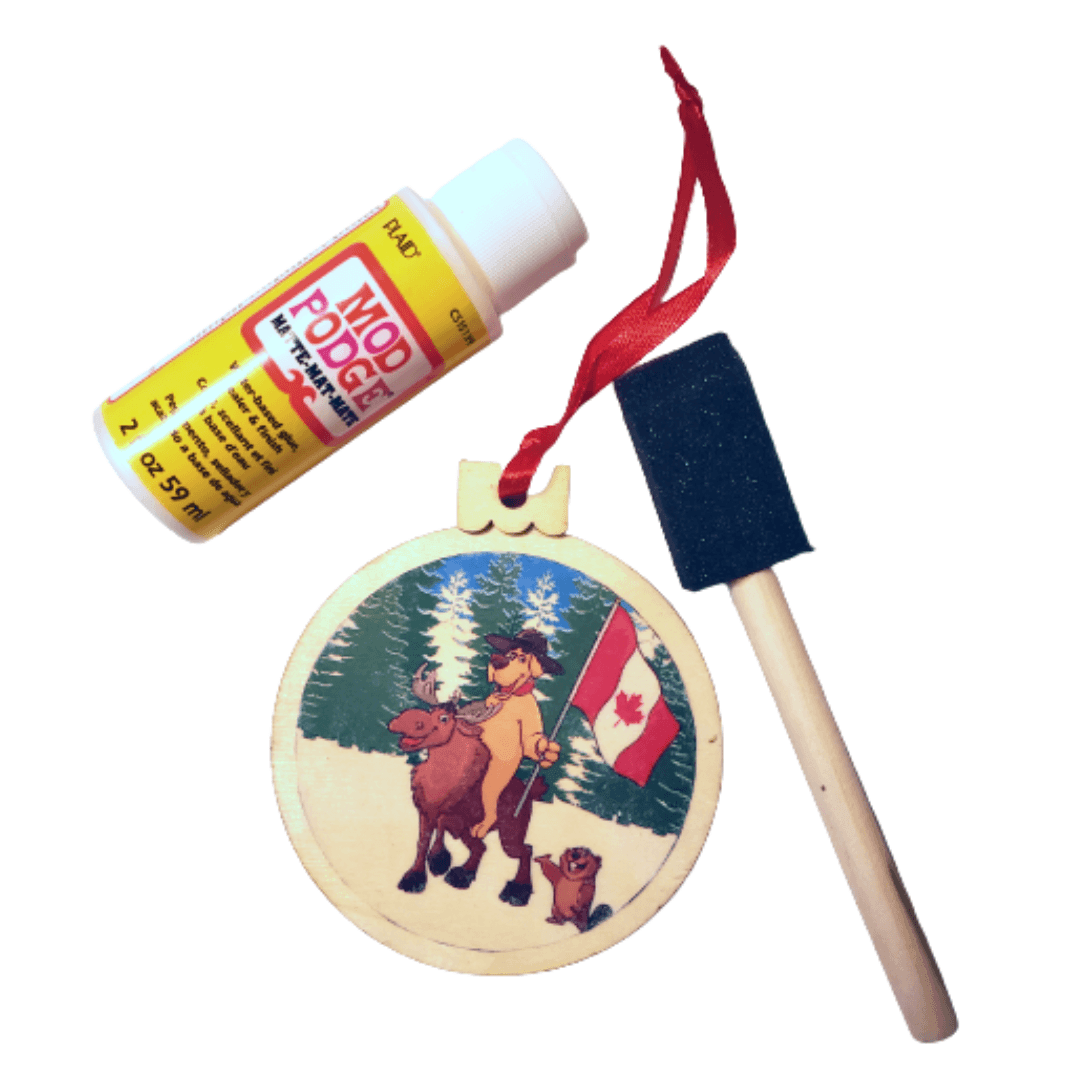
Wooden ornaments (easily found at your local craft store)
-
Photo Transfer Mod Podge (satin finish)
-
Sponge brush (a couple if you will be making a lot of ornaments)
-
Paper towel
-
Access to water
-
Ruler
-
Laptop with internet access (a cell phone also works but can make aspects of this more difficult)
-
Laserjet printer (if you don't have one, photos can be printed locally at Staples, etc.)
Step 1
Go to canva.com and sign up for a free account if you don't already have one.
Create a design, select "custom size", create an 8.5 x 11" project


Step 2
On the left side click "elements" and then select the "circle" category.

Click a circle outline, it will appear on your page. Ensure the outline you select doesn't have a filled-in background otherwise your photo won't show properly in the following steps.

Step 3
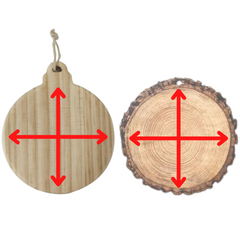
Measure the area on the ornament you want the photo to be in. Take note of the measurement in inches.
Step 4
Use the measurement from Step 3 and make the circle in Canva the same size. As you make your circle smaller/larger in Canva you will see the size reflected in a box beside it in inches.

Step 5
In Canva at the top right of the screen select "share". Click "download"

Select "pdf" from the drop-down menu, and then click "download".

Step 6
Go to your downloads folder and print it on regular printer paper with any type of printer (a laserjet printer is not required for this step).

Cut out the circle outline and ensure it's the correct size for your ornament.

If it's not the right size, change the size of your circle in Canva, download, print, and cut it out on regular printer paper until you achieve the desired size.
Step 7
Copy and paste the circle in Canva spacing it evenly throughout the document so you have room to cut around each.

Step 8
Upload your dog photos into your Canva document.
Step 9
Place your image on the page. Select the image and press "flip" at the top of the screen.
Select the image and press the 3 dots, then "send to back".

Adjust the image so the part you want to appear on the ornament are within the circle.

Repeat this step for every ornament.
Step 10
In Canva at the top right of the screen select "share". Click "download".

Select "pdf" from the drop-down menu, and then click "download".

Step 11
Go to your downloads folder and print the pdf file on normal paper with a laserjet printer.
If you do not have a laserjet printer you can print the pdf files at a location like Staples. Printing this document on anything other than a laserjet printer will yield far less desirable results.

Cut out the circle outline and ensure it is the correct size for your ornament.

Step 12
Use photo transfer Mod Podge (satin finish) and cover the front of your photo with the sponge brush.
Ensure all air bubbles are pushed out. Running a debit/credit card lightly over the image works really well to do this. Clean up any excess mod podge with paper towel. Don't forget to clean off your debit/credit card too!

Repeat this step for all photos and ornaments. Let them dry completely (usually overnight is best).
Step 13
Use a damp sponge or paper towel and saturate the back of the photo with water.
Gently rub the white paper off with your finger, exposing the image underneath.

Don't rub too much off and remove your image. The goal is to rub off the white paper revealing your image, but not enough to remove the ink.
Let it dry. If too much white is showing dampen it again and rub off the excess paper. Repeat this step as much as you need and for each ornament.
Step 14
Ensure your ornament is clean (no paper fuzzies) and apply one light coat of mod podge (satin finish), let dry, and then you're ready to hang your ornaments!

Enjoy!!!